Thursday, August 16, 2012

Voice Search arrives in 13 new languages

“Norwegian restaurants in New York City.” I can type that phrase fast, but I can say it even faster—and when I’m on the go, speed is what I’m looking for. With Voice Search, you can speak into your phone to get search results quickly and easily. Voice Search is already available in 29 languages, and today, we're bringing support to 13 new languages for Android users—bringing the total to 42 languages and accents in 46 countries. In fact, 100 million new speakers can use Voice Search now, with the addition of:
  • Basque
  • Bulgarian
  • Catalan
  • European Portuguese
  • Finnish
  • Galician
  • Hungarian
  • Icelandic
  • Norwegian
  • Romanian
  • Serbian
  • Slovak
  • Swedish

Each new language usually requires that we initially collect hundreds of thousands of utterances from volunteers and, although we’ve been working on speech recognition for several years, adding these new languages led our engineers and scientists to tackle some unique challenges. While languages like Romanian follow predictable pronunciation rules, others, like Swedish, required that we recruit native speakers to provide us with the pronunciations for thousands of words. Our scientists then built a machine learning system based on that data to predict how all other Swedish words would be pronounced.

This update has already started to roll out, and will continue to do so over the course of the next week. How you get started with Google Voice Search depends on what kind of phone you have. If your phone runs Android 2.2 or later, and you see the microphone icon on the Google Search widget on your homescreen, all you have to do is tap the icon to start a voice-powered search. Otherwise, you can install the Voice Search app from Google Play. Note that you can only speak one language into the app at a time, and you may need to change your language settings to use one of these new languages.

As with other languages we’ve added, one of the major benefits to Google’s cloud-based model is that the more people use Voice Search, the more accurate it becomes.

Posted by Bertrand Damiba, Product Manager

Creating Your Own Spelling Checker Service

Posted by Satoshi Kataoka and Ken Wakasa of the Android text input engineering team


The Spelling Checker framework improves the text-input experience on Android by helping the user quickly identify and correct spelling errors. When an app uses the spelling checker framework, the user can see a red underline beneath misspelled or unrecognized words so that the user can correct mistakes instantly by choosing a suggestion from a dropdown list.


If you are an input method editor (IME) developer, the Spelling Checker framework gives you a great way to provide an even better experience for your users. You can add your own spelling checker service to your IME to provide consistent spelling error corrections from your own custom dictionary. Your spelling checker can recognize and suggest corrections for the vocabularies that are most important to your users, and if your language is not supported by the built-in spelling checker, you can provide a spelling checker for that language.


The Spelling Checker APIs let you create your own spelling checker service with minimal steps. The framework manages the interaction between your spelling checker service and a text input field. In this post we’ll give you an overview of how to implement a spelling checker service. For details, take a look at the Spelling Checker Framework API Guide.


1. Create a spelling checker service class


To create a spelling checker service, the first step is to create a spelling checker service class that extends android.service.textservice.SpellCheckerService.


For a working example of a spelling checker, you may want to take a look at the SampleSpellCheckerService class in the SpellChecker sample app, available from the Samples download package in the Android SDK.


2. Implement the required methods


Next, in your subclass of SpellCheckerService, implement the methods createSession() and onGetSuggestions(), as shown in the following code snippet:

@Override                                                                        
public Session createSession() {
return new AndroidSpellCheckerSession();
}

private static class AndroidSpellCheckerSession extends Session {
@Override
public SuggestionsInfo onGetSuggestions(TextInfo textInfo, int suggestionsLimit) {
SuggestionsInfo suggestionsInfo;
... // look up suggestions for TextInfo
return suggestionsInfo;
}
}


Note that the input argument textInfo of onGetSuggestions(TextInfo, int) contains a single word. The method returns suggestions for that word as a SuggestionsInfo object. The implementation of this method can access your custom dictionary and any utility classes for extracting and ranking suggestions.


For sentence-level checking, you can also implement onGetSuggestionsMultiple(), which accepts an array of TextInfo.


3. Register the spelling checker service in AndroidManifest.xml


In addition to implementing your subclass, you need to declare the spelling checker service in your manifest file. The declaration specifies the application, the service, and a metadata file that defines the Activity to use for controlling settings. Here’s an example:

<manifest xmlns:android="http://schemas.android.com/apk/res/android"
package="com.example.android.samplespellcheckerservice">
<application android:label="@string/app_name">
<service
android:label="@string/app_name"
android:name=".SampleSpellCheckerService"
android:permission="android.permission.BIND_TEXT_SERVICE">
<intent-filter>
<action
android:name="android.service.textservice.SpellCheckerService" />
</intent-filter>
<meta-data
android:name="android.view.textservice.scs"
android:resource="@xml/spellchecker" />
</service>
</application>
</manifest>


Notice that the service must request the permission android.permission.BIND_TEXT_SERVICE to ensure that only the system binds to the service.


4. Create a metadata XML resource file


Last, create a metadata file for your spelling checker to define the Activity to use for controlling spelling checker settings. The metadata file can also define subtypes for the spelling checker. Place the file in the location specified in the

element of the spelling checker declaration in the manifest file.


In the example below, the metadata file spellchecker.xml specifies the settings Activity as SpellCheckerSettingsActivity and includes subtypes to define the locales that the spelling checker can handle.

<spell-checker xmlns:android="http://schemas.android.com/apk/res/android"
android:label="@string/spellchecker_name"
android:settingsactivity="com.example.SpellCheckerSettingsActivity" />
<subtype
android:label="@string/subtype_generic"
android:subtypeLocale="en" />
</spell-checker>


That’s it! Your spelling checker service is now available to client applications such as your IME.


Bonus points: Add batch processing of multiple sentences


For faster, more accurate spell-checking, Android 4.1 (Jelly Bean) introduces APIs that let clients pass multiple sentences to your spelling checker at once.


To support sentence-level checking for multiple sentences in a single call, just override and implement the method onGetSentenceSuggestionsMultiple(), as shown below.

private static class AndroidSpellCheckerSession extends Session {                 
@Override
public SentenceSuggestionsInfo[] onGetSentenceSuggestionsMultiple(
TextInfo[] textInfo, int suggestionsLimit) {
SentenceSuggestionsInfo[] sentenceSuggestionsInfos;
... // look up suggestions for each TextInfo
return sentenceSuggestionsInfos
}
}


In this case, textInfo is an array of TextInfo, each of which holds a sentence. The method returns lengths and offsets of suggestions for each sentence as a SentenceSuggestionsInfo object.


Documents and samples


If you’d like to learn more about how to use the spelling checker APIs, take a look at these documents and samples:

  • Spelling Checker Framework API Guide — a developer guide covering the Spelling Checker API for clients and services.

  • SampleSpellCheckerService sample app — helps you get started with your spelling checker service.

    • You can find the app at /samples/android-15/SpellChecker/SampleSpellCheckerService in the Samples download.


  • HelloSpellChecker sample app — a basic app that uses a spelling checker.

    • You can find the app at /samples/android-15/SpellChecker/HelloSpellChecker in the Samples download.


To learn how to download sample apps for the Android SDK, see Samples.


Join the discussion on

+Android Developers


Tuesday, August 14, 2012

The "I'm Feeling Lucky" Easter Egg

The "I'm Feeling Lucky" button from Google's homepage is no longer useful when Google Instant is enabled. When you click the button, Google usually sends you to the doodle gallery, but now the button is more special.

Mouse over the "I'm Feeling Lucky" button and you'll see one of these labels: "I'm Feeling Puzzled", "I'm Feeling Artistic", "I'm Feeling Playful", "I'm Feeling Hungry", "I'm Feeling Wonderful", "I'm Feeling Stellar", "I'm Feeling Trendy", "I'm Feeling Doodly". Each button sends you to a different Google site, so you can explore Google Trends, the Google Art Project, the World Wonders Project and more.


{ Thanks, Jérôme Flipo. }

Monday, August 13, 2012

Google's New Favicon

Google has a new favicon that looks like the icon from Google's mobile search apps for Android and iOS. The same icon was also used for the Google Search app from the Chrome Web Store.

Most likely, Google wanted to use the same icon irrespective of the platform so that it becomes instantly recognizable.

Here's the new favicon:


... and the old favicon, which was launched back in 2009:


This screenshot shows the first three Google favicons. As you can see, the new favicon has a lot in common with the second favicon used by Google. "We felt the small 'g' had many of the characteristics that best represent our brand: it's simple, playful, and unique. We will be looking to improve and enhance this icon as we move forward," said Google back in 2008, when it changed the favicon for the first time.


If you don't see the new favicon when you visit google.com, try clearing your browser's cache.

{ Thanks, Arpit Kumar. }

Tuesday, August 7, 2012

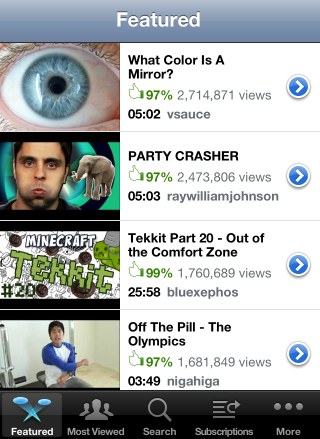
YouTube App, No Longer Included in Apple's iOS

Starting with iOS 6 beta 4, the YouTube app is no longer bundled with Apple's mobile operating system. Apple "said Monday that its license for YouTube has expired, meaning the app will no longer be included in the next version of its mobile operating system, iOS 6. That version is expected to be released to the public this fall and developers are already using it," reports The Wall Street Journal.


Back in 2007, when Apple launched the iPhone, YouTube's video player required Flash, so YouTube videos couldn't be played without a special application. YouTube, which was acquired by Google in 2006, transcoded some of the videos to H.264 and allowed Apple to build a native YouTube application. "To achieve higher video quality and longer battery life on mobile devices, YouTube has begun encoding their videos in the advanced H.264 format, and iPhone will be the first mobile device to use the H.264-encoded videos. Over 10,000 videos will be available on June 29, and YouTube will be adding more each week until their full catalog of videos is available in the H.264 format this fall," mentioned a press release from 2007.

The app is no longer that useful, now that YouTube's mobile site has a great interface and more features than the native app. YouTube's HTML5 video player lets you play videos from Safari or any other browser, so many iPhone users don't even use the YouTube app. Just like the Maps application, the YouTube app was neglected by Apple, which didn't add many useful features. Google has constantly improved the YouTube app for Android and now will also develop a YouTube app for iOS.

Maybe Apple wanted to release a Google-free version of the iOS and the next step could be switching to Bing as the default search engine in Safari, but things are not that bad for Google. After all, YouTube is the most popular video sharing site and Google Maps is the most popular online mapping service. Google can develop its own apps, update them more often and add new features.

Even if YouTube's mobile site can replace the native app, there are two features that couldn't be added by YouTube: uploading videos and supporting the old embedding code. The good news is that both features are available in iOS 6 beta 4 and it's likely that the final version will continue to include them.

Monday, August 6, 2012

Custom Colors in Google Calendar

Last year Google added a new color palette for Google Calendar and many users complained. Some of them thought that the new calendar colors make it difficult to tell events apart, while other people wrote that they're too muted.

Now you can customize calendar colors. Just click the arrow icon next to a calendar in the left sidebar, click "choose custom color" and pick your favorite background color. Select "light text" if the text is hard to read.


"Google Calendar users have had the ability to change the colors of specific events or calendars from a default color palette. Users can now choose a custom color if the default palette does not meet their needs," informs Google. This feature is also available for Google Apps.

Saturday, August 4, 2012

Create Keyboard Shortcuts for Chrome Extensions

Chrome 22 (currently in the Dev channel) has a cool feature that lets you set keyboard shortcuts for extension buttons.

Just open the extensions page (click the wrench icon, then select Tools and Extensions), scroll to the bottom of the page and click "Configure commands". You can enter shortcuts for all the extensions that use browser actions, a fancy name for the buttons displayed next to the Omnibox.


Right now, you can only set shortcuts that simulate clicking the buttons, so they're not useful for all extensions. For example, they're useful for the "Google +1 Button" extension because you can quickly +1 pages, but they're not useful for the LastPass extension because it only displays a long list of options.

There's an experimental Chrome API for extension developers that allows them to add keyboard shortcuts that trigger actions and it's likely that users will be able to customize these shortcuts.

Some shortcuts that work: Ctrl+Letter, Ctrl+Digit, Ctrl+Shift+Letter, Ctrl+Shift+Digit. You can even override standard shortcuts like Ctrl+T, Ctrl+C or Ctrl+P, but you shouldn't do that.

YouTube's Topic-Centric Homepage Experiment

YouTube continues to test new homepage interfaces focused on popular topics. YouTube's topic pages look like channels, but they're automatically generated by YouTube using videos that are related to a topic.

The homepage also shows videos from popular channels. All the links that start with "YouTube -" send you to topic pages for things like "Olympic weightlifting", "Gymnastics", "Driving under the influence", "James Bond Film Series" or "Chick-fil-A". Click "more" to see more videos from the channel or topic page.


The new UI experiment is very similar to the "carousel" interface I've mentioned last month. It only works when you're not logged in and YouTube redirects you to a new page: youtube.com/lohp.

Here's how you can try the latest YouTube experiment. If you use Chrome, Firefox, Opera, Safari or Internet Explorer 8+, open youtube.com in a new tab, sign out, then load:

* Chrome's JavaScript console (Ctrl+Shift+J for Windows/Linux/ChromeOS or Command-Option-J for Mac)
* Firefox's Web Console (Ctrl+Shift+K for Windows/Linux or Command-Option-K for Mac)
* Opera's Dragonfly (Ctrl+Shift+I for Windows/Linux or Command-Option-I for Mac)
* Safari's Web Inspector (how to do that?)
or
* Internet Explorer's Developer Tools (press F12 and select the "console" tab)

and paste the following code, which changes a YouTube cookie:

document.cookie="VISITOR_INFO1_LIVE=9UnXBzJIHDc; path=/; domain=.youtube.com";window.location.reload();

Then press Enter and close the console. Go to youtube.com/lohp to see the experimental interface.

Update: There's also an experiment that redirects users to the "videos" page, which shows popular videos from various categories.


{ via Techno-Net. }

Google's Sidebar-less Search Experiments

Many people noticed the Google search interface experiment I've mentioned back in June. Google tests multiple versions of the interface, but they have one thing in common: the left sidebar is replaced with a horizontal navigation bar.

The new horizontal bar includes Google's specialized search engines and a "search tools" link that displays the advanced search options. The bar is either aligned with the search box or it's aligned with the black bar, depending on the experiment.


It's obvious that Google wants to get rid of the sidebar and make search options more visible, but the new bar might confuse users and the left padding makes the page look unbalanced.

{ Thanks, Ruben, Param, Denis. }

No More Mobile iGoogle

Last month, Google announced that iGoogle will be discontinued next year. Few people noticed a help center article which informed users that "the mobile version will be retired on July 31, 2012".

The mobile iGoogle site no longer works, even if the iGoogle link is still included on the homepage. "As Google announced in early July, iGoogle's mobile version has been retired," mentions a Google employee. Unfortunately, you can't even use the desktop iGoogle site on a mobile device without changing the user agent. You can do that in the mobile Chrome for Android and iOS or in the stock Android 4.0+ browser by visiting www.google.com/ig and selecting "request desktop site" from the menu.


Google suggests users to try mobile apps and add widgets to the home screen if they have an Android device. There are all kinds of apps for weather, news, mail, unit conversion, translation, but the nice thing about iGoogle is that everything is displayed on a single page you can could access from any device. The "Google Now" feature from Android Jelly Bean could replace the mobile iGoogle once Google adds more cards.

Wednesday, August 1, 2012

Use any credit or debit card with Google Wallet

(cross-posted from the Google Commerce Blog)

Since we released the first version of Google Wallet, the app that makes your phone your wallet, we’ve made it available on six phones from Sprint and Virgin Mobile, as well as the new Nexus 7 tablet. We’ve also partnered with more than 25 national retailers, and thanks to MasterCard PayPass, you can pay with your phone at more than 200,000 retail locations across the U.S.

Today we’re releasing a new, cloud-based version of the Google Wallet app that supports all credit and debit cards from Visa, MasterCard, American Express, and Discover. Now, you can use any card when you shop in-store or online with Google Wallet. With the new version, you can also remotely disable your mobile wallet app from your Google Wallet account on the web.


A wallet with all your credit and debit cards
To save a card to Google Wallet, just enter the number into the mobile app, online wallet, or Google Play when making purchases. When you shop in-store, you can use Google Wallet in conjunction with your selected credit or debit card for purchases (more info here). Shortly after making a payment, you’ll see a transaction record on the phone with the merchant name and dollar amount. You can now view a history of all your in-store and online purchases from the online wallet.


To support all credit and debit cards, we changed our technical approach to storing payment cards. The Google Wallet app now stores your payment cards on highly secure Google servers, instead of in the secure storage area on your phone. A wallet ID (virtual card number) is stored in the secure storage area of the phone, and this is used to facilitate transactions at the point of sale. Google instantly charges your selected credit or debit card. This new approach speeds up the integration process for banks so they can add their cards to the Wallet app in just a few weeks. Banks that want to help their customers save cards to Google Wallet, including their custom card art, can apply here — there is no cost.

A wallet you can lock — and remotely disableWe take security very seriously and have always had a dedicated Google Wallet PIN to prevent others from making payments with your Google Wallet. And as always, we encourage Google Wallet customers to set up the phone’s screen lock -- as an extra layer of protection.

Today, we’re adding a Google Wallet security feature that makes it possible for you to remotely disable your mobile wallet on a lost phone. It’s easy. If you lose your phone, just visit the ‘Devices’ section in the online wallet and select the phone with the mobile wallet you wish to disable. When you successfully disable your wallet on a device, Google Wallet will not authorize any transactions attempted with that device*. If the Google Wallet online service can establish a connection to your device, it will remotely reset your mobile wallet, clearing it of card and transaction data. There is no way you can do that with your leather wallet.


The new Google Wallet app is available now on Google Play, and if you have a supported NFC device and are in the United States, we encourage you to give it a try.

Posted by Robin Dua, Head of Product Management, Google Wallet

* For now, Google Prepaid Cards and some Citi MasterCard cards will remain active until Google Wallet can remotely connect and reset your mobile wallet.